Category: Uncategorised

Chapter 7: Literacy Mini Lesson

This photo was created using canva

UFLI is a program introduced by the University of Florida Literacy Institute:

“After more than two years of development and pilot testing, we are excited to introduce you to UFLI Foundations, an explicit and systematic program that teaches students the foundational skills necessary for proficient reading. It follows a carefully developed scope and sequence designed to ensure that students systematically acquire each skill needed and learn to apply each skill with automaticity and confidence. The program is designed to be used for core instruction in the primary grades or for intervention with struggling students in any grade.” (University of Florida Literacy Institute)

UFLI in this grade 1/2 classroom always starts on the carpet. The students are close together and working as a team. The teacher is watching for student participation but no students are put on the spot. If needed later the teacher can do small group work to hear individual student voices. Right now all students are calling out the answers together. A great way to achieve this is to have a cue so students know when to start answering.

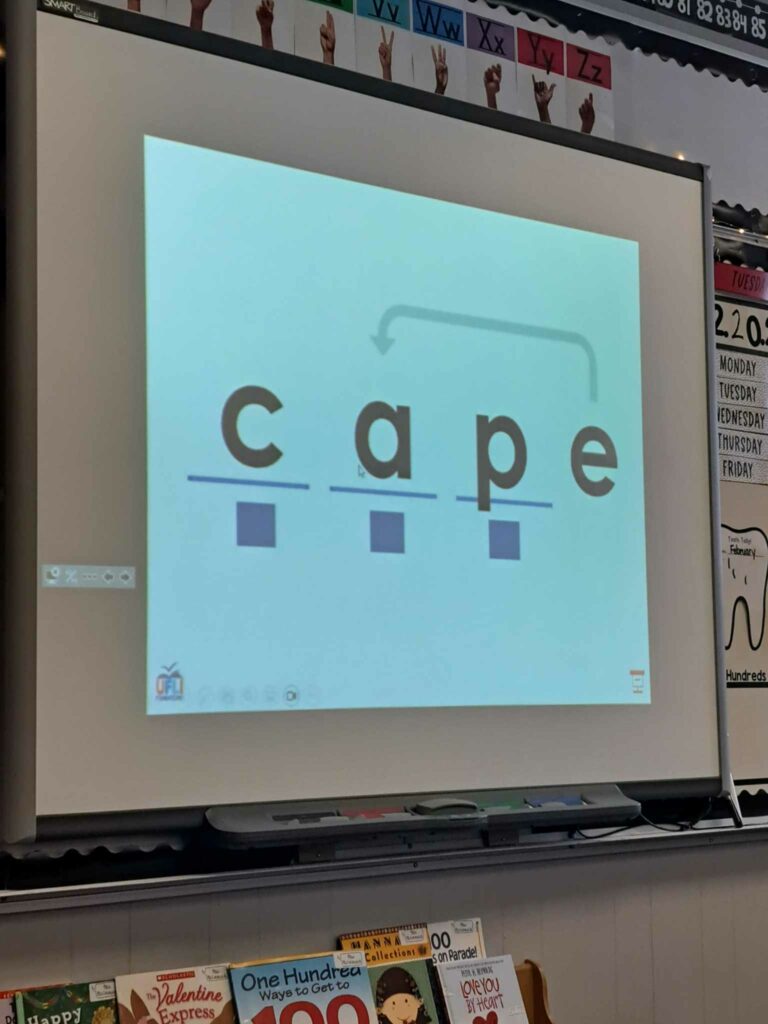
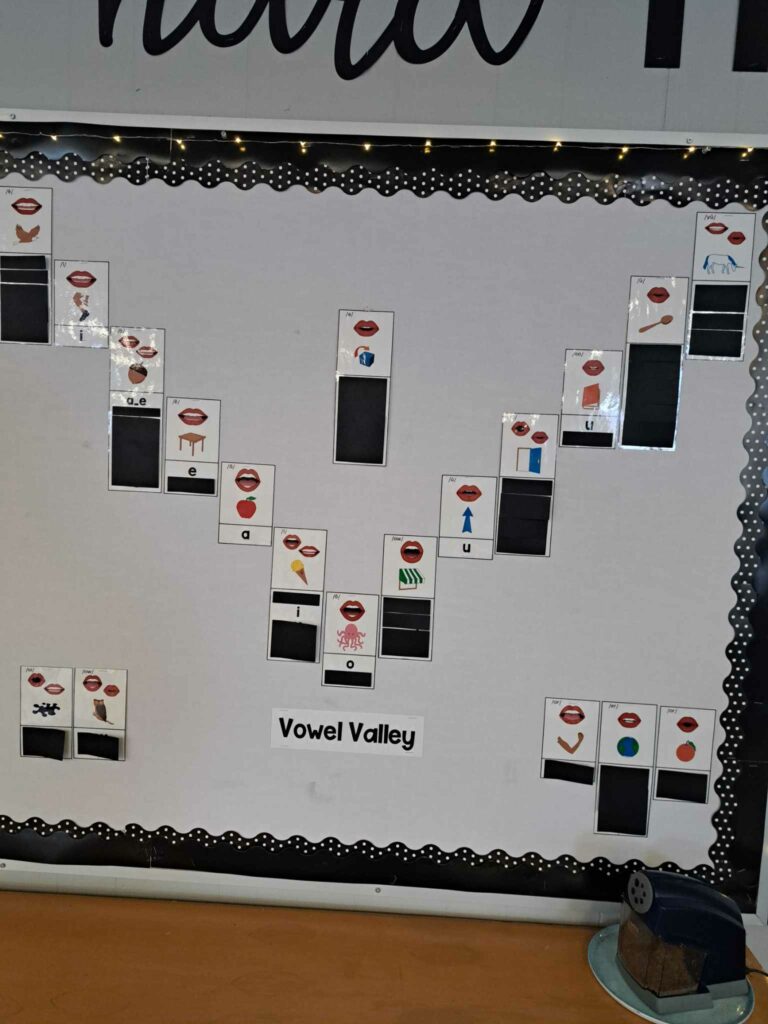
In the lesson I was observing the students were working on the vowel sound “a” being a long vowel when the word ends in an “e”.

The classroom teacher started with a sound and pound for words appropriate to todays letter sound. This drill works to help students hear the words they are learning. The teacher said the individual letter sounds (sound) and the students responded by saying the word (pound). Then the teacher says the word (pound) and the students say the individual sounds. For example:

First:

Teacher says: “m” “a” “d(e)” Students respond: “made”

Teacher says: “s” “a” “m(e)” Students respond: “same”

Then:

Teacher says: “bake” Students respond: “b” “a” “k(e)”

Teacher says: “cake” Students respond: “c” “a” “k(e)”
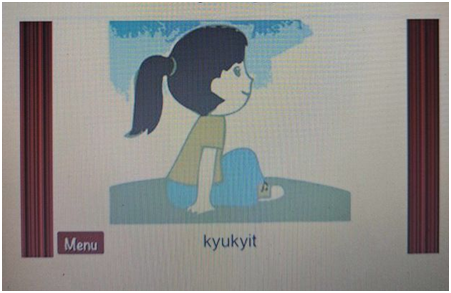
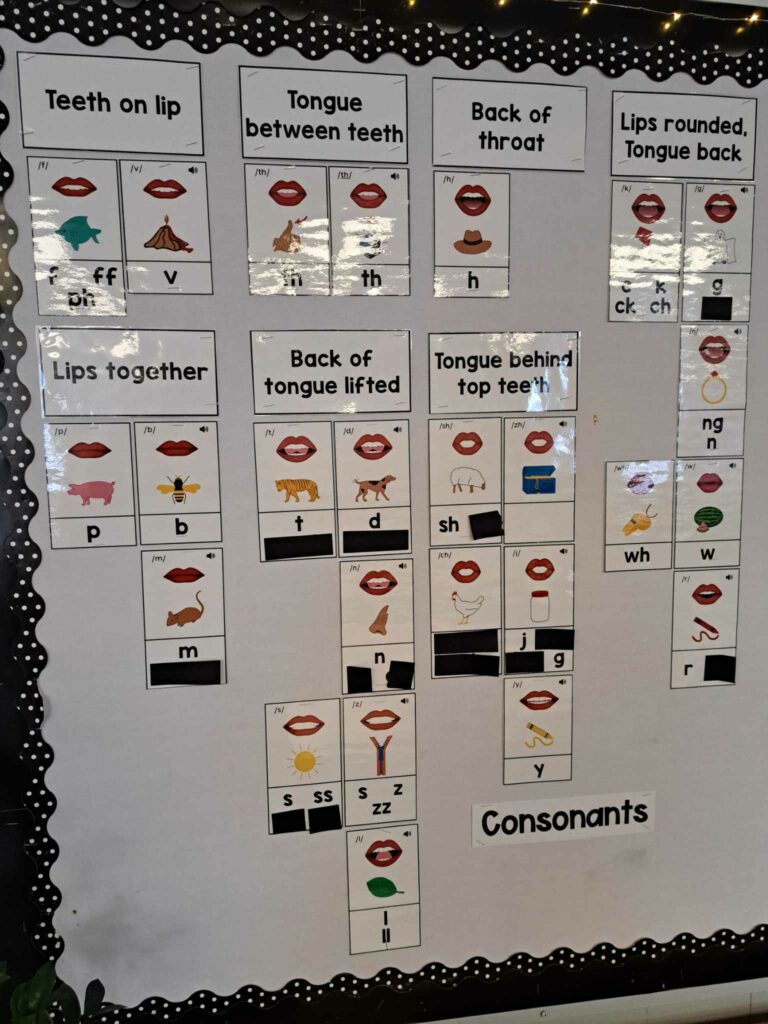
This next drill allows the students to see the words they are learning.

Each letter sound is connected to a picture:

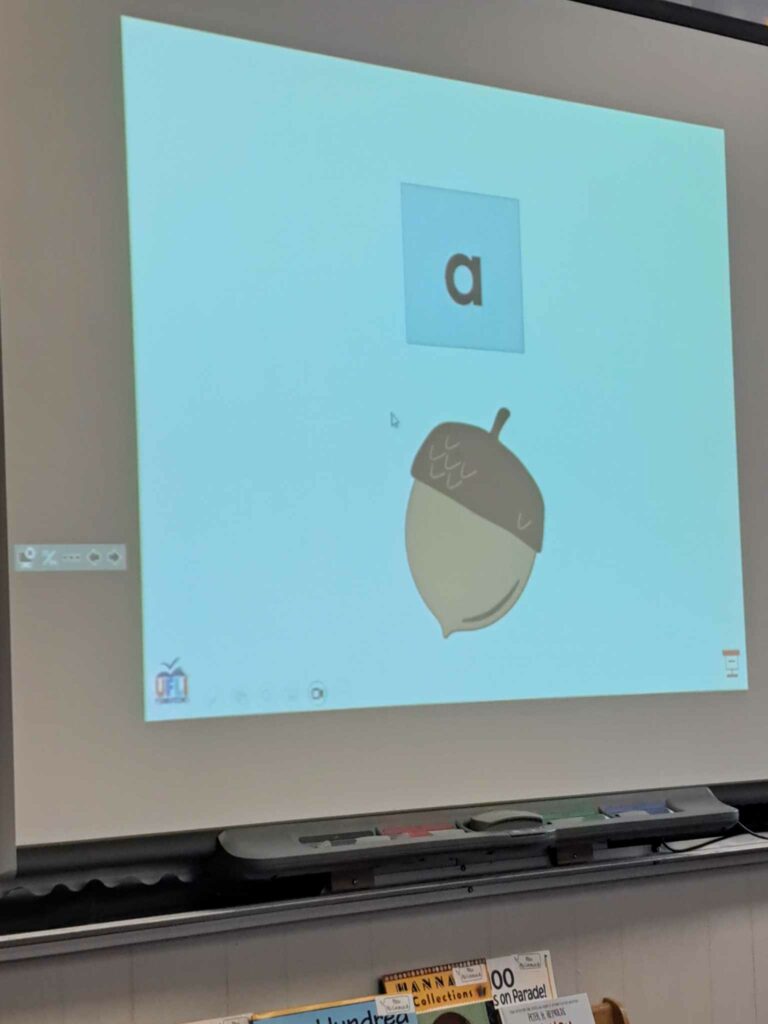
Students read out the word as a class:

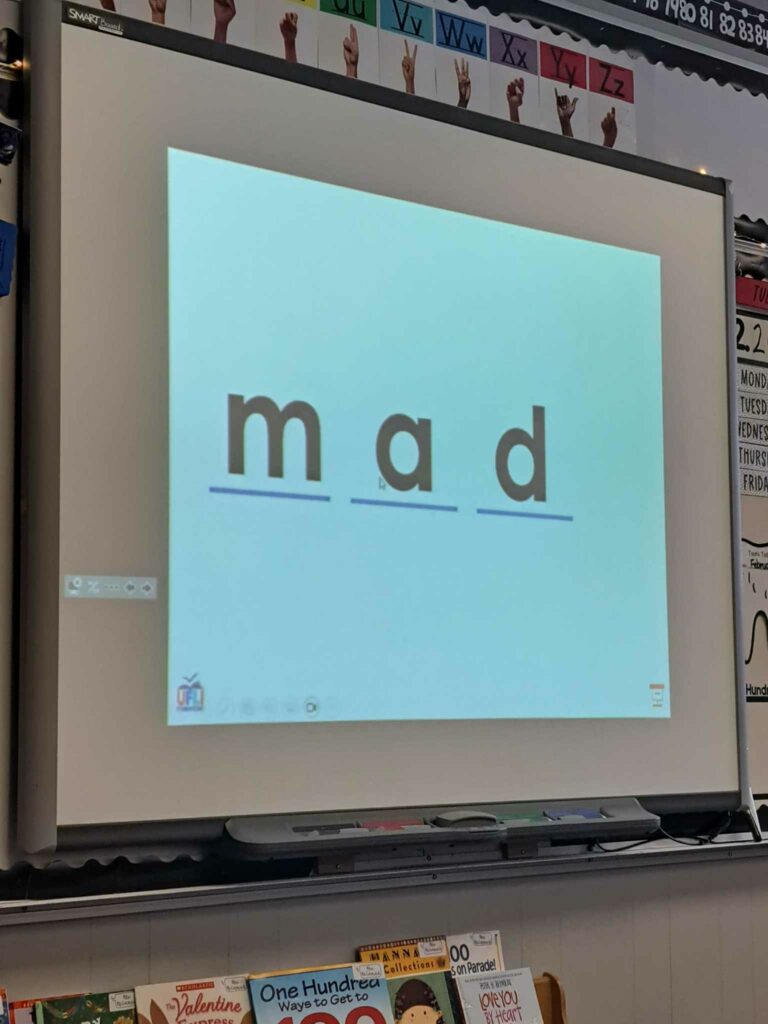
The teacher introduced this concept by using the word mad. Mad has a short vowel “a” sound, however when you add an “e” to the end of mad the new word made “a” has a long vowel sound.

The teacher first verbally explained this concept. Then the students saw the word written on the smart board and heard the difference as they read each word. Then they read out other words with the same pattern. The repetition of reading multiple words out loud began to cement the learning for the students.

Students were then sent to their desks to practice what they just learned using mini white boards!

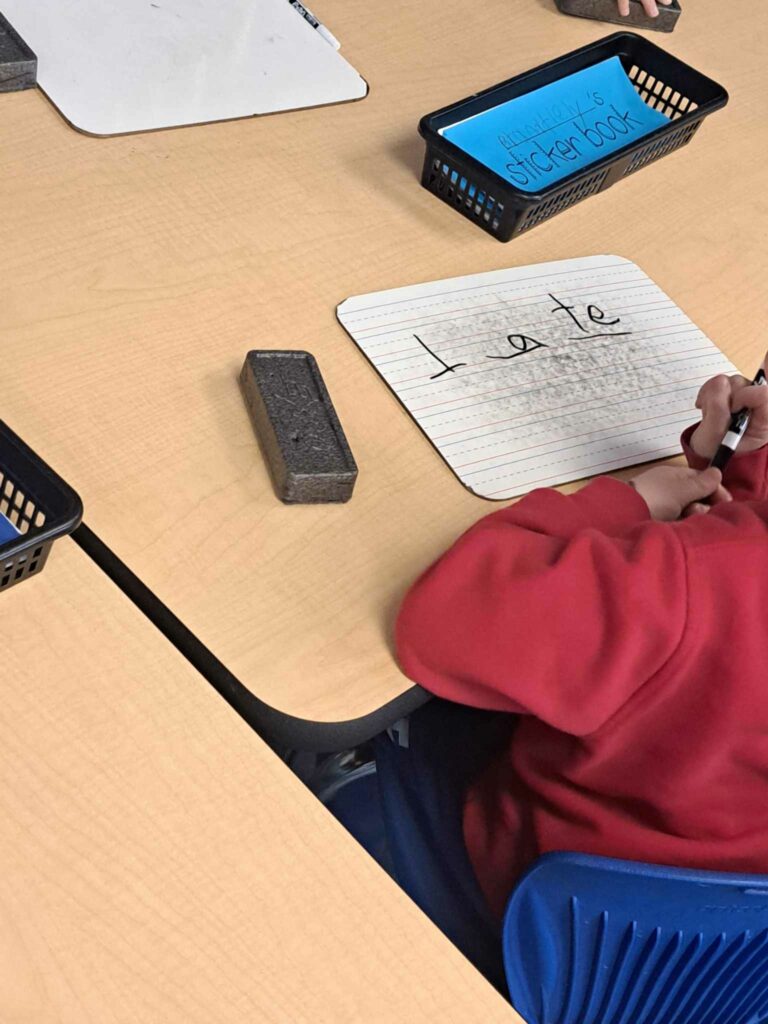
Using Sound and Pound students are asked to write out the words they teacher is saying. The teacher says: “late” “l” “a” “t”. Once the students have written the word they are to hold up their white board to show to the teacher.

This is a great way to formatively assess which students understood the lesson and were able to put it into practice. There are no formal grades given out for this desk work, but the teacher is able to take mental notes of which students were not able to keep up. Consistent observing of students gives the teacher a deeper understanding of her students current abilities.

UFLI is completed every single morning right after the students arrive. The teacher shared with me that she never schedules anything else in the morning so that UFLI is always done at the exact same time. This is when her students are at their very best! UFLI is done in the same order every day so while the content they are working on changes the routine remains the same. The students know exactly what is being asked of them and there are no interruptions to learning due to confusing instructions.

My biggest take away from observing this lesson is the teachers use of her wall space to connect to UFLI. After the students learn a new sound she unveils the letter on her sound wall. This is a great reward for students as they are motivated to uncover the entire wall. The sound wall also works to remind students of what they have already learned and can be referred back to at any time.

Core Competency:

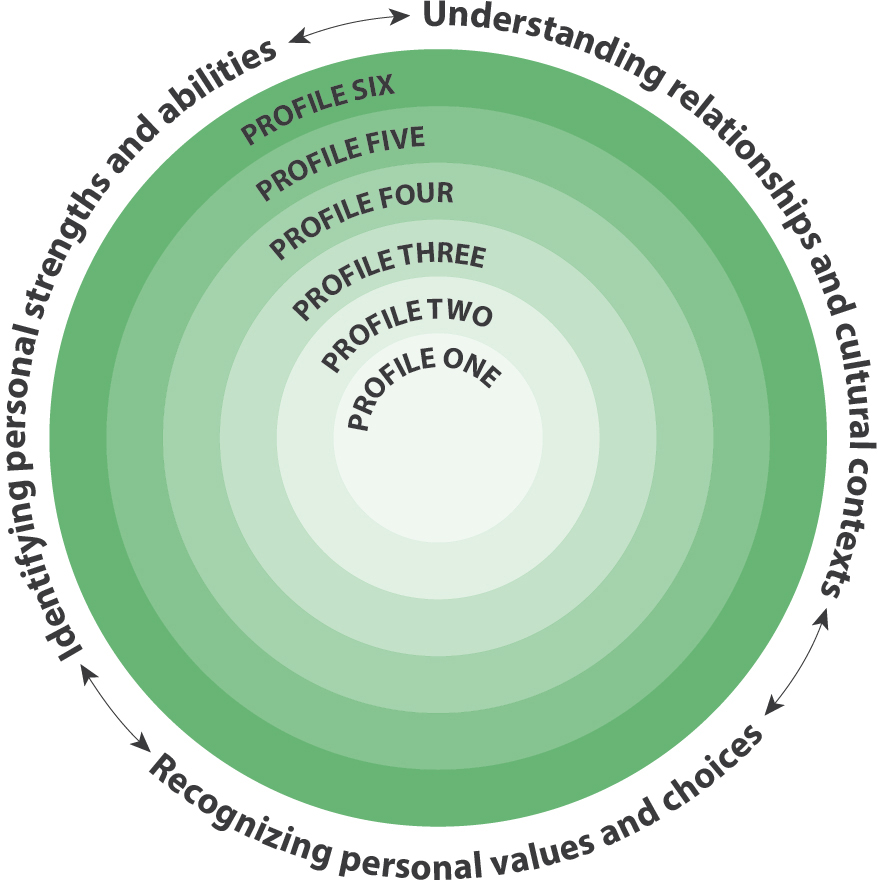
  • Communication- Profile 2: I talk and listen to people I know. I can communicate for a purpose. I can understand and share basic information about topics that are important to me, and answer simple, direct questions about my activities and experiences. (Students demonstrate this learning verbally when they share information on the carpet and written when they share information on their white board.)

English Language Arts 2:

Big Ideas:

  • Playing with language helps us discover how language works.

Curricular Competencies:

  • Read fluently at grade level
  • Use sources of information and prior knowledge to make meaning (Students demonstrated this because they were required to remember what they already learned about long and short vowels in order to understand todays lesson)
  • Communicate using sentences and most conventions of Canadian spelling, grammar, and punctuation (Students demonstrated this during individual work time on the white boards when they worked on spelling the words)

Content:

  • word patterns, word families (UFLI teaches students how to read and to recognize patterns in the English language)

I was extremely excited about observing this lesson. Teaching reading to young students is very challenging and something I need to continue to practice. One thing I did to help extend my learning is call out the answers with the students. When I teach reading I am learning to be aware of the ways my mouth moves as I say sounds, so practicing reading words and saying vowel sounds with students is a great way for me to cement my learning. During the white board activity I practiced watching the whole group and taking note of which students may require extra support. I engaged with the students by asking them questions about what they were doing. They have a set routine on how UFLI works I their classroom, by explaining that routine to me the students were working on their communication!

Additional Resources:

UFLI has tons of video’s on YouTube that are worth watching

Anna DiGilio (experienced elementary teacher) posted an useful video entitled Are You Implementing UFLI Foundations this Year?

Seriously just type in “teaching UFLI” into youtube, there are so many videos to learn from! The greatest resource of all is other teachers in the building, that is why I am so grateful to have had an opportunity to observe an amazing teacher implement this program!

Chapter 6: Story Vines

This photo was created using canva

Story Vine is an activity described in my Textbook “Sometimes Reading is Hard” by Robin Bright. This activity can be found on page 92 of the text. A Story Vine is an art project that teaches students how to retell a story.

“According to Marlene, story vines are based on an old African tradition of
storytelling and can be used to develop language and support reading and writ-
ing across the curriculum. Story vines involve both planning and performance
but are rooted in what students are reading.” (Bright, page 92)

Story Vine is an activity that has been adapted and used across the country by educators! The CBC published an article on teachers creating story vines titled: Winnipeg teachers learn how to weave colourful fabric into stories. The photo below is taken from this article.

Photo by the CBC on Winnipeg teachers creating Story Vines

I created a story vine based on the activity in “Sometimes Reading is Hard” by Robin Bright. My Story Vine was created on the book “The Paper BAg Princess” by Robert Munsch and Michael Martchenko. This is how I would teach a story vine in my class.

Step 1: Chose A Story: To create a story vine you are going to need to pick a book with strong images. You may want to teach the students about symbolism prior to this activity.

Step 2: Read the Story: Read the Story aloud to the class. Make sure to go slow and pause throughout the story so students remain engaged. Take the time to carefully look at all the photos. This may be a great time to do a photo analysis prior to beginning the read. To do this print out copies of pictures from the book and have students predict what they think is happening.

Step 3: Retell the Story As a Class: On a White Board summarize the main points of the story as a class.

Step 4: Model a Story Vine to the Class- Decide on pictures/figurines/drawings to represent the story.

Step 5: Model the Story Vine to the Class-Weave the yarn into a braid. As you go braid the artifacts into the story vine in the order they appear in the story.

Step 6: Model the Story Vine to the Class- Retell the Story using your story vine. Make sure to be expressive and enthusiastic when you demonstrate to your students.

Step 7: Have Students create their own Story Vine! First they will pick out their artifacts, then braid their yarn while adding in the artifacts, finally they will retell the story using their story vine! It is important to first demonstrate the activity so students understand what is being asked of them. I found it can be hard to image what the story vine should look like from verbal or written instructions alone.

  • Take it slow! This does not need to be an activity done in one afternoon. On day one you could do a mini lesson on symbolism so students understand how they can use artifacts to represent a story. Day two you can read the story, do predictions, look at the pictures and summarize the beginning, middle and end. Day 3 you can model the story vine as a class and then Day 4/5 you can give students time to work on their own story Vine. Day 6 you can perform the story vines with retelling!
  • Make sure you have lots of materials! I created my story vine using tissue paper wrapped around the artifacts because I did not have any yarn. It is important to preplan to make sure you have everything the students could need. Maybe ask students to bring artifacts from home, do this after reading the story and modelling a story vine but before they create their own. Otherwise start gathering materials early, use other teachers as resources!
  • Have fun! This activity is creative and hands on. It is a great activity to do with a buddy class so students can work together.

*** These links are connected to the grade 4 curriculum but could be adapted to fit younger or older grades

Collaboration: Have students work in small groups or with a buddy class. Students will learn to work together to create a shared story

Content:

  • processes, materials, technologies, tools and techniques to support arts activities (Arts Education) Student can practice using a variety of materials to get the desired results
  • symbolism and metaphor create and represent meaning (Arts Education)
  • literary elements (ELA) Students will explore the characters, setting, plot, conflict and purpose (beginning, middle, end in younger grades)

Curricular Competencies:

  • Create artistic works collaboratively and as an individual using ideas inspired by imagination, inquiry, experimentation, and purposeful play (Arts Education)
  • Interpret and communicate ideas using symbolism to express meaning through the arts (Arts Education)
  • Use oral storytelling processes (ELA) Students will retell the story

Big Ideas:

Texts can be understood from different perspectives (ELA) Students will all retell the same story. Since all students are unique each retelling will be unique as well.

The paper bag Princess was a great story to use for this activity because it followed a clear sequence of events. The story is easy to follow, has beautiful images in the book to use to inspire students and has a lovely message.

The message: I like that the book defies the expected gender norms for the time it was written. It shows the importance of mental strength when physically outmatched and it teaches children that what is inside your heart is what matters.

Chapter 5: AI Tools for Literacy

Photo created with canva

Magic School is a Free AI tool designed for teachers, with the option of paying for a premium service. Check it out below:

video created with Screencastify

I like magic school because it is simple to use. Everything on the site is related to teaching with the intention of elevating my career path. The less time teachers are spending on tasks like scrolling for lesson ideas, the more time the teacher can spend adapting a lesson to fit their students unique needs. I find the site flows and is fairly straightforward to find what you need.

The side panel splits the site into AI tools, chatbot for additional support and history of your work created with magic school.
The top panel sorts all the tools into categories based on the teachers needs from the AI.
At the top of the site you can star your favorite tools for easy access.

I would use this feature to create reading samples for my students on specific topics. I would start with a resource I want to teach and have the AI modify the text for any of my students who I believe would struggle with the original text. This is a great way to add supports or challenges to students while ensuring a classroom community of students all learning together.

The text leveler is an AI tool used to modify any text for different grade levels.

Benefits: all your students reading the same material within their reading abilities.

Caution: texts need to still be careful read through and edited for grammar, appropriate terms and appropriate levels for reading. This is not an easy copy and paste reading sample. You must still do the work to ensure it fits your students needs.

I would use this tool as a starting off point on a new unit. It may give me ideas I would like to try in my classroom and make suggestions about the order of which I should teach my content. This will not be used to write any of the unit plans I end up teaching.

This AI tool is used to create a unit plan. You enter your grade, length and topics and it will create a unit plan.

Benefits: Gives you lots of ideas quickly with less scrolling

Cautions: This is NOT a final product. The AI tool does not know your students and your environment.

I would use this tool to create examples for my students for lessons I have not taught before. Students like to be able to see the end results when you describe an assignment. Typically I would ask my prior students if I could show some of their work but teachers are constantly evolving and changing their teaching and wont always have past work to show.

This AI tool is used to create responses to assignment questions.

Benefits: This is a huge time saver. The teacher does not need to write all the responses themself.

Students can see multiple writing styles, not just their teachers.

Caution: Always edit and read any work before sharing it with your students.

Chapter 4: Literacy Mini Lesson

This image was created using canva

The grade 6 class that I observed for in-situ had library for first block. The beginning of the block they worked on a lesson with the librarian and then the students got some time to exchange their books and read. One of the big advantages I noticed from this set up is the students get a chance to learn from multiple teaching styles. While I was in the class the students were learning about comic books!

Goal: The end goal is for the students to create their own comic strips. By having the students watch videos and take notes the students focus on particular pieces of their comic strip. This can be used for assessment and to make sure students fully understand what is being asked of them. This is a unit that took place over a couple months because of the limited time they had with the librarian. I only got to watch a few weeks of planning and note taking.

Core Competency: Creative Thinking. “I generate new ideas as I pursue my interests. I deliberately learn a lot about something by doing research, talking to others, or practicing, so that I can generate new ideas about it.” Students were being guided in research to generate ideas on the comic they will be creating.

Big Ideas: Questioning what we hear, read, and view contributes to our ability to be educated and engaged citizens. Students worked on this big idea because they had to question which parts of the videos were important and decide what should be included in their notes.

Curricular Competencies: Access information and ideas for diverse purposes and from a variety of sources and evaluate their relevanceaccuracy, and reliability Students worked on this when they watched the video and took notes. Students knew their purpose and were given the source and needed to decide what was relevant.

Synthesize ideas from a variety of sources to build understanding. Students worked on this when they watched videos to build understanding on creating a comic.

Content: Text Features. Students focused on the specific ways text is displayed in a comic strip.

Literary Elements. Once students start creating their comic they will focus on building characters, setting and narration.

The students started the lesson by watching Dave McDonald Art on youtube. Each day they watched a few 5ish minute videos from the series Kids Make Comics.

The benefits of using a youtube video are:

  • The person presenting is an expert in this topic
  • Students are very familiar with this media and it feels like a treat to them

*** remember to ALWAYS pre watch any video before playing it in front of your students

While the students watched the video they were asked to take notes on the topics from the youtube video.

The notes were taken in the same style as the comic book to get students familiar with the formatting.

All the notes were stored in a nice booklet set up by the teacher so all student work was in one place.

Throughout the video the teacher paused to ensure students had time and could discuss the notes. This made sure all students got the information.

Dave Mcdonald Art- Kids Make Comics covered a large range of topics related to creating a comic book. It is up to the teacher to decide which videos fit into the curriculum they are trying to teach. Here is a list of topics offered:

  • Simple Shapes make Super Characters
  • Inking your comics
  • making comic panels
  • Where do ideas come from
  • Making word balloons
  • Fridge door comics
  • making big bold lettering

The lesson ended by having the students practice making a comic. This comic will not be used for a summative grade, however the teacher can see if the students are putting their notes into practice!

This activity can be adapted by having more or less details put into the pictures. Some ways to do this could be:

  • Have all the pictures filled in and students write word bubbles
  • Have pictures be a connect the dotes activity so the students can practice drawing comic pictures with some support

I did not get to observe this class long enough for them to finish the project, these are samples from previous years. The theme of this years comic was humor.

I love watching other teachers teach. I learn so much from being in the moment and observing their lesson. One challenge I find from this environment is these are not my students and I never know how much intervention is appropriate. Something I can do to help this is connect with the teacher before the students arrive. I can ask them “How can I support you while in your classroom?” and “Are there any behaviors I need to be aware of?” This way the teacher can provide boundaries of what they expect from the visitors in their classroom.

Chapter 3: Using Authentic Sources

I am grateful to be learning within the traditional territory of the Ktunaxa Nation. I would like to acknowledge the ancestral preservation of the pristine land I enjoy everyday. The beautiful mountains are a peaceful presence for reflecting and adapting lessons. The lovely forests create engaging environments for outdoor learning and play. I promise to follow the lead of the Indigenous community to maintain this land for future generations.

Roxanne is the author of the article Putting First Nations Texts at the Center which focuses on finding appropriate Indigenous resources. She free-lanced as a library consultant for the Little Red River School, north of Prince Albert. Roxanne and her team worked to go through the library and get rid of books that were not considered authentic. She shared a bit about her process:

“Think of it this way: when a story is written about a white child, the child is seen as an individual, so the Native child as an individuated subject became the basis of my criteria for the collection. Therefore, I discarded those stories about the Native child that used that child to stereotype, moralize, generalize, and objectify—to write about a nation, a people, instead of about a child.”

Rudine published a groundbreaking essay “mirrors, windows, and sliding glass doors” in 1990. She was a decorated scholar, college professor, and author and pioneered the concept. This concept was influential for creating vital experiences for children of ALL backgrounds in reading. I will use this idea when I am creating a classroom library to ensure all of my students can find books where they are represented. In order to achieve this goal it is vital that I know my students and make connections with their families to learn about their history. I will also need to be constantly updating my library and willing to follow the advice of the most current research. Check out the concept below:

Following the research of Roxanne Harde’s criteria for an authentic source that sees the child as an individual and Dr. Rudine Sims Bischop’s theory on children’s vital experiences in reading I have put together a sample of a handful of books I will be including in my library to ensure I have authentic sources for my Indigenous children to relate to.

“Sometimes I feel like a Fox” introduces the reader to 12 totem animals and their associated meaning in Anishinaabe tradition. Each page introduces a new animal in short, two sentence poems detailing the unique characteristics of that animal.

This book is created by Canadian and Indigenous author Danielle Daniel and is an authentic source representing the Anishinaabe community.

“How Raven Stole the Sun” is an origin story from the Tlingit community of how a once pure white raven became black as coal while releasing the light that has been held captive.

This book is written based on the oral stories passed down by the Tlingit community and is written by a Tlingit woman named Maria Williams and Illustrated by Felix Vigil.

If you would like to find more local Indigenous resources check out the article 14 inspiring children’s books from Indigenous writers shared by the CBC.

**** connections are made to the grade 5 English Language Arts Curriculum, similar connections can be made at both older and younger grade levels

Big Ideas:

  • Texts can be understood from different perspectives. (by using texts from people of all backgrounds you are teaching your students that everyone has a unique perspective and every voice matters)

Curricular Competencies:

Content:

  • perspective/point of view

Chapter 1: Reading Interest Survey

Photo Sourced from Canada Commons

The Reading Interest Survey comes from the textbook Sometimes Reading is Hard by Robin Bright. This textbook is available through Canada Commons. The Survey can be found on page 155 and can be adapted for any grade level. The purpose of the survey is to find out what interests YOUR students to keep them MOTIVATED and ENGAGED in reading!

Photo created using canva

I really enjoy reading because it allows me to experience lifestyles different then my own. I am a binge reader, once I start a book I want to keep reading until the end. When I was younger I would stay up way past my bedtime because I just had to know how the story ended.

Photo created using canva

I like to play soccer, go on hikes, swim in Mineral Lake in the Summer and do archery.

Photo created using canva

Photo created using canva

Drop: An Adventure Through the Water Cycle by Emily Kate Moon. I used this book to teach a science lesson and I noticed it really engaged some of the students who may not normally follow along in the lesson!

Photo created using canva

photo created using canva

My absolute favorite topic to learn about is Canadian history. I find it truly fascinating to learn about all the inspiring people who shaped the modern world.

photo created using canva

Adaptions: The survey I answered involved lots of writing. Students in younger grades would struggle to complete the survey using full sentences. Instead have the students draw their answers. You could also discuss what books the student has read and print out photos of the books. Then students could cut and paste the pictures into their survey to show you books they have previously enjoyed.

Benefits: Completing this survey at the beginning of the year is an excellent way to get to know your students. Once you have an idea about the types of books a student enjoys you can help your students to find more books they will love. This will encourage more reading from your students.

Extensions: Once the students have completed their survey you could have them share with the rest of the class. This would help your students to find kids with similar interests to their own.

Curriculum Links: This is a sample of how I would link this activity to the BC Curriculum for grade 4. This activity allows you to get to know your students, but it also helps your students to get to know their own reading style.

Core Competency: “Positive Personal and Cultural Identity”

Photo sourced from the bc curriculum website

Profile 3: “I can identify my individual characteristics and explain what interests me. “

Big Ideas: “Language and text can be a source of creativity and joy.” This activity focuses on helping students identify the stories that they enjoyed and the genres that give them the most joy to read.

Curricular Competencies: “Use personal experience and knowledge to connect to text and deepen understanding of self, community, and world”

Content: “metacognitive strategies” Students reflect on past activities and reading that they have enjoyed.

Digital Portfolio’s- Week 10

A digital portfolio is digitalizing student Artifacts. This involves posting student work online which is a great way to share with families what learning is happening in your classroom in real time!

What artifacts might you want to share?

PHOTOS

VIDEOS

VOICE RECORDINGS

DRAWINGS

DOCUMENTS

School & District -Subscriptions | Seesaw
Photo from their website

Seesaw is a great online site to create a digital portfolio for your students! Seesaw is very accessible with a desktop version, a free app and the ability to access straight on a mobile device. I really enjoyed how EASY TO NAVIGATE seesaw is because that makes it realistic for students to be successful on this device! I noticed how the teacher has control to adjust the settings so they can set all posts to be approved before posting as you begin to teach students what is appropriate to post online!

********My loyal blog readers may be wondering why Seesaw sounds so familiar well it was a part of my Assignment 2 What makes a good blog project! Check out my walk through tutorial if you have not had a chance yet!

created on canva

One way to use this in the classroom?

The LESSON PLAN: Students will use a digital portfolio like Seesaw to create a family free inquiry for Science class! Students would pick an animal of their choice to get the project started and share a photo, video or document explaining which animal they chose. Parents would comment a question they have about the animal and that question would be the topic of next weeks post on the topic! Continue for 5 weeks with the parents asking questions and the students conducting research and sharing the new information online with their parents!

CAREFUL: some students may not have a family that is able to support this project so the teacher would need to step up and share in those students learning!

BENEFITS:

  • students learn to do research to answer questions
  • students learn to share their learning using a digital portfolio
  • parents can learn alongside their child
  • students learn to report information in a clear manner
  • will great make discussion points at home while introducing seesaw to the students as well as their parents
created on canva

EDCI Presentation’s Overview Day 2

photo found on unsplash by
Minh Pham

How can Virtual Reality Experiences be used in the classroom?

Types of Virtual Reality:

Headset on and see environment (Virtual Reality)

  • Virtual Reality: player puts on a headset and is fully immersed in the environment displayed by the headset
  • Augmented reality: player puts on a headset/glasses and you see the data from the glasses overlaid over their normal surroundings
  • Extended reality: merges the two realities. Unattainable for classroom use, currently for military accesses, pilots….

PlayStation Titanic VR:

Playstation is an example of a tethered VR as the processes are uploaded directly into the source!

What do you need? headset, led light remotes, camera on tv (track movements using light).

contains inside out tracking: cameras in headset tracking pieces of information (stand alone technology)

Learn history and physically BE A PART of the titanic

PROS: ENGAGING, new way to learn (novel), hands on, tech continues to advance and is only getting better!

CONS: outdated software (cost to update), set up time (can be complicated to set up the first time), limited educational software (lots of video games), motion sickness

Smart phone VR: Librarium, Hand Physics Lab, Nanome, Star Chart

What you need: contained devices (like a computer) with all the tech you will need!

These are great for free inquiry’s, creating a virtual study room, online notes and learning materials that may not be accessible in a classroom!

PROS: ENGAGING, hands on, novel, simple set up, portable, affordable (single cost to operate), open source activities (lots of options!), own browser in device, options for software support

CONS: you need to set up every time, gaming device bias, simplified graphics, you need to recharge device, students with physical disabilities may struggle with it (this is a project they are work on)

Overall VR is a way to get kids EXCITED for learning in a modern new way that is always growing and improving. It provides kids opportunities to explore tech and be a part of places they could only dream of seeing!

Photo found on unsplash by Wilkins Morales

How can Virtual Fieldtrips be used in a classroom?

  • take students on virtual tours from the comfort of the classroom
  • supplement students learning using (jamboard, quizlet)
  • engage students in opportunities they may not otherwise have
  • motivate the students to learn

Kindergarten Virtual Field Trip

virtual trip to the zoo!

activity ideas: create their own habitat, field trip passport, teacher can create their own personalized virtual tour

make it special with costumes, decorations, art, make it feel like a field trip not just a video!

Grade 8 Virtual Field Trip

Mount St Helens

activiy ideas: jam board check ins, allow students to record questions on jamboard and after doing the research as a class create a YOUTUBE video to answer the students questions, student made quizzes

PROS

  • engaging
  • no physical limitations
  • accessible to all students
  • can be fit to student interests
  • teaches student internet safety
  • helps visual learners

CONS

  • potential tech issues
  • how to get funding?
  • how to get students moving?

ethical note: be sure to demonstrate best practices and pay for the products you use, this is someone’s work!