Page 2 of 3

COMPUTATIONAL THINKING- Week 8

Computational thinking is a strategy for problem solving. There are four steps to computational thinking meant to provide order and intent to ones thinking in order to solve complex problems. Lets explore each of those steps:

STEP ONE DECOMPOSITION: Break down the problem into smaller, manageable pieces rather than attempting to look at the problem as a whole.

STEP TWO PATTERN RECOGNITION: Observe patterns within the problem. Are the pieces of the problem you broke up related (same cause)? This is an excellent time for learners to look to their previous knowledge to see how this could help them now. Has this happened before?

STEP 3 ABSTRACTION: Analyze the problem’s complexity. Pull out the significant details and only focus on the pertinent information. Ignore any details that do not directly affect your ability to solve the problem.

STEP 4 ALGORITHMIC THINKING: Create a set of rules required to solve the problem. Create a step by step plan to address the issues.

BC Curriculum:

Computational thinking can be brought into the classroom to help students with independence and group problem solving and it fits into the curriculum in a few different ways. I found there are ways to fit computational thinking into every core competency to varying degrees depending on the focus of your teachings.

Communicating Core Competencies
core competencies for the BC curriculum, the photo
was taken directly from their website

Teacher Talk (Vocabulary for Understanding):

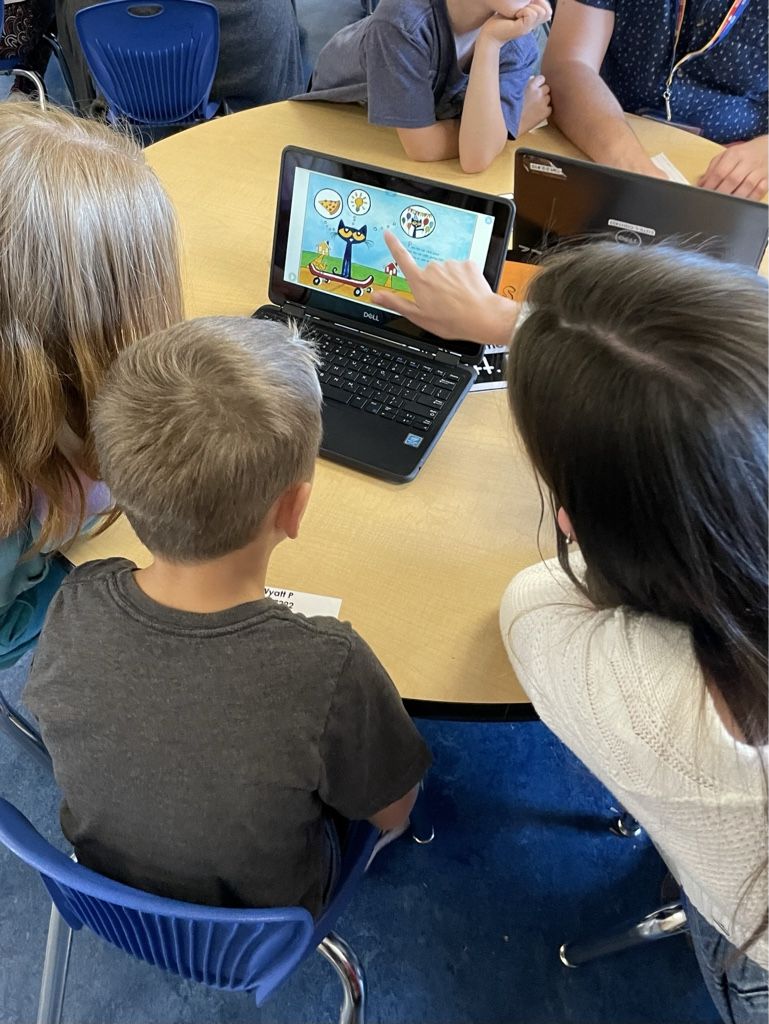
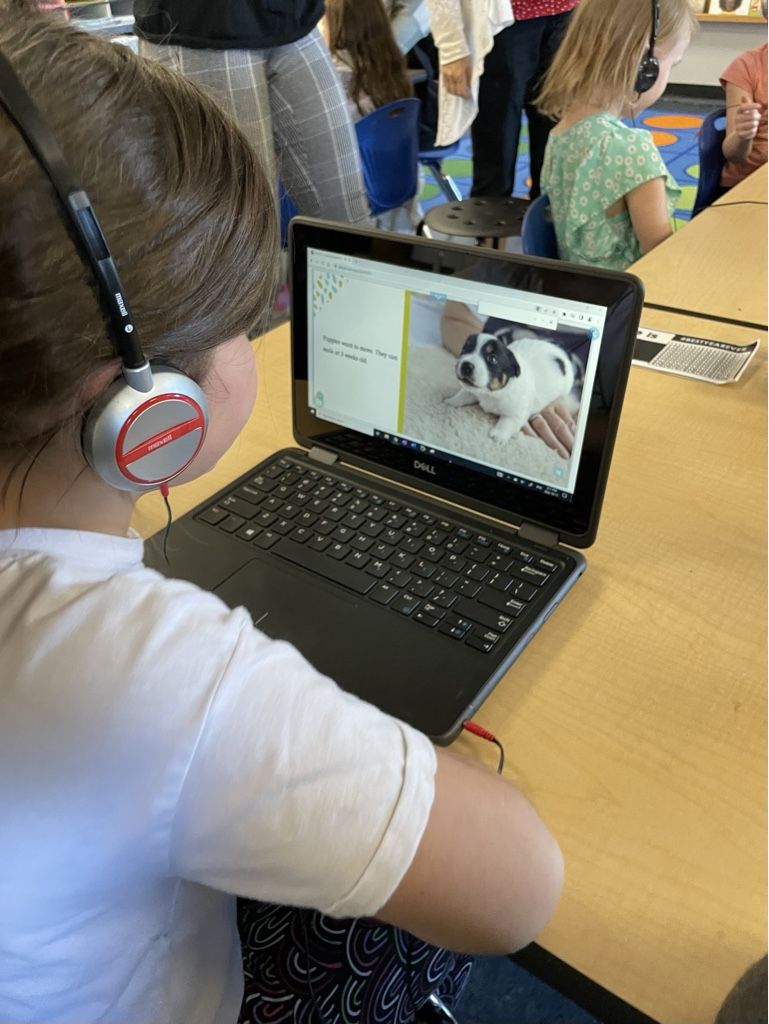
Paired Programming: When students work together to code on a shared piece of technology rather than a 1:1 ratio of students and computers

Collaboration: students learn to work towards a common goal

Critical and reflective thinking: students learn to examine their own thinking

Personal awareness and responsibility: students learn to make constructive and ethical decisions

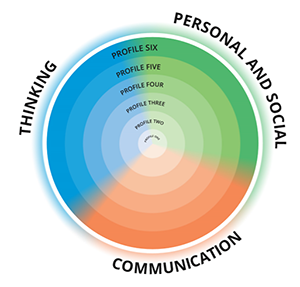
CORE COMPETENCY TEACHINGS WITH COMMPUTATIONAL THINKING:

COMMUNICATION: Computational thinking can be taught in small groups to solve complex problems the students are struggling with. A great example of this is paired programming which is an excellent way to teach collaboration under the bc curriculum.

THINKING: Computational thinking has thinking in the name so it must teach thinking right!?! Specifically I would categorize this under critical and reflective thinking. Students are learning how to analyze a problem, observe the problem, question when something goes wrong and learn from their mistakes!

PERSONAL AND SOCIAL: Computational thinking teaches students personal responsibility and independence. Giving students complex problems to solve and teaching them strategies to be successful rather than showing them how to fix it can be a frustrating act for the kids who get stuck. Allowing them to preserver by themselves fits into the BC curriculum under Personal Awareness and Responsibility as the students work on regulating emotions and managing their stress when they are thinking through complex problems. I always find when a student panics is when they lose sight of the goal. Computational thinking works on breaking a problem down into smaller pieces and completing things one step at a time which is important for stress management.

EDCI Presentation’s Overview Day 1

Over the last month our class has been working on creating projects to answer important questions on using technology as a classroom tool you can find my project under Educational Technology Presentation but here is what I learned from my classmates:

How can we create a more inclusive classmate using tech?

The goal is to provide resources to allow all students to be engaged and for the teacher to be able to reach all their students!

Virtual Classroom

zoom lectures

Teams

blackboard websites

google classroom

(online resources to provide the lesson to students either in real time or posted to access at any time)

Immersive reader

reading support system

there is a google chrome immersive reader extension to use for any website and device

Nearpod

collaborative boards that can be presented live or student paced (code protected)


Pros

  • students can work at their own pace
  • revisit lecture from class
  • available anytime anywhere
  • keep up on classwork if you miss a day
  • students can have a voice online if they feel less comfortable speaking out

  • translates for learning English
  • excellent for students with difficulty reading screens
  • you can colour coordinate parts of speech (verbs, nouns…)
  • user chooses the speed of reader and can pause on tricky words
  • offers independent choices for extra support

  • has a whiteboard to interact with lesson during a presentation
  • student results are emailed right to the teacher
  • lots of features to keep students engaged
  • student paced
  • has built in immersive reader
  • audio submission options if typing is a challenge
  • assign pods for virtual collaboration
  • you can add a coteacher

Cons

  • learning curve
  • inaccessible to some (must have tech at home)

  • students could rely on immersive reader but it may not always be available
  • cost to use
  • tech does not always work or is not always available

  • requires individual tech that is not always accessible
  • students may face temptation to use their device for games rather than learning
  • site does not support canav
  • internet could fail, have a backup plan
  • has American based materials

How does Technology supports diverse learners?

Technology can help to create an inclusive environment, adapt for student needs, engage students, allow for differential instruction.

Seeing AI– free app to describe people, text, objects to you and uploads the page directly to a digital file.

PROS: -speak to text – uses camera phone (accessible to most students

-describes a photo or face to students with visual impairments -reads text to help

students read – transfers scribe to create digital files

CONS: – digital voice can be hard to understand – minor description glitches (age,

race, sensitivity concerns)

Eye Gaze Tech: It uses eye movement tracking to control the computer and make selections by blink activation, a manual switch or dwell for selection (stare at screen for a set amount of seconds to make selection

PROS: – helps with mobility disabilities, cerebral palsy, autism…. – easy to learn

and use – allows students independence – used to diagnose visual disabilities

– has been used to diagnose autism as early as 6 months – helps students

communicate effectively – has games to practice using the technology –

students can create PowerPoints for school

CONS: – expensive – not accessible for everyone

Immersive reader: used to read text out loud, edit student work, draw focus to specific words for student learning.

PROS: -change colour to learn vocabulary (nouns, verbs) – highlight words

student needs help with – changes line spacing ( helps with visual disabilities)

– helpful to teachers, students with ADD, vision impairments, autism, dyslexia

– free with Microsoft account (most schools supply)

CONS: – can be loud and require headphones,

Breathe Think Do with Sesame Street: this is a game where you work through activities with a buddy monster

PROS: -reads to you – works on problem solving – helps with behavior issues – helps students monitor breathing – helps students be independent

CONS: – not very customizable would be cool to create a schedule for the student

in the game to work on routines

SPOOKTACULAR ICE BREAKERS

Happy Halloween! This year Halloween falls on a Monday so teachers have a class full of sugared up children PUMPED to go trick or treating after school. It an be a challenging day to keep students focused so why not throw in some holiday themed fun to allow the students breaks to refocus!

created on canva

The idea for this Ice breaker came from I Want to be a Super Teacher on Pinterest. I modified the activity so a student who is eliminated is only out for 1 round rather than the entire game. I believe this allows for a more inclusive activity, especially with the younger students.

This activity is a fun way to spice up a Physical Health Education class! I like the idea of having themed activities for the students to stay engaged! It is important to allow the students some control in their education so having them invent one of their own exercises is great for ensuring the students feel involved. I might use this activity to have students take turns leading each exercise to work on communication skills and confidence talking in front of a class. This activity was found on Pinterest posted by Your Therapy Source.

This last icebreaker is a fun way to get students excited for drama with some Halloween themed acting! I would get the students to first name any Halloween themed nouns. Start by reminding the students that a noun is a person, place or thing. Students may list things like:

  • pumpkin
  • bat
  • ghost
  • spider
  • witch

The listing of nouns is a great language arts lesson to set up a fun game of CHARADES! Write down all the nouns students came up on pieces of paper and have students act out the word on their paper so classmates could guess!

Extension: Instead of nouns students could list verbs to act out!

Adaption: Students could act out any noun they wanted and everyone in the class writes what they think is being acted out on a piece of paper. All the papers are then collected and the actor reads out the guesses.

STOP MOTION VIDEOS- Week 7

Over the last couple weeks I have been creating some stop motion videos with the app Zing Studio! The first video I created was with fellow classmates and was my first time ever creating a video of my own. I am super proud of the work we created with our first attempt but there sure is room for growth! Check it out:

scan this QR code to check out the stop motion video we made with the students

The second video I created was with a group of 3rd grade students at a local elementary school. For this video we encouraged the students to control the themes and ideas and helped put their ideas into video. I was so impressed with how much the kids knew about stop motion video. They taught us how to add sound effects with was a fun feature we played around with!

WHAT DID I LEARN?

  • after my first attempt I learned how to add SOUND EFFECTS into the stop motion video
  • during our second video the kids wanted to stop our progress to DELETE a photo so we needed to quickly learn how to go back in and continue a started video
  • Prior to our first video we talked about limiting ourselves to only a FEW PROPS which is something we should have reinforced within the video with our students
  • dropping the “boulder” in our in situ video was a really cool idea the kids had, it took a few attempts to figure out the best way to MOVE AN OBJECT UP AND DOWN rather than side to side but I honestly think it looks awesome

Stop motion videos are created by taking a photo and then moving the subject a tiny bit and continuing to take a photo for each little movement made! I may use this technique in a classroom to have students explore an animal in their natural environment. I would tell the student to focus on 1 animal and 2 props to teach us either how the animal gathers food or where the animal nests. Another project that I could do with my students is share a story with the kids and have them use the same theme to create a unique story using stop motion. This would have a focus on parts of a story and using technology as a learning tool.

Object motion: made using objects, toys, (like lego) both my stop motion videos fit in this type

Claymation: uses clay for characters and background

Cutout animation: uses paper cut outs for characters and background

Puppet Animation: a puppet is used for the main focus of the video

Pixilation: stop motion is created using human subjects

Silhouette: characters are shown as black shadows

The information on these types of stop motion can be found here, this source has some great video examples of each type of video so I highly recommend checking it out!

Photos Used (listed from left to right):

Found on Unsplash by Daniel K Cheung

Found on Pexels by Cup of Couple

Found on Pexels by Artem Podrez

Found on Pexels by Vlada Karpovich

Found on Unsplash by Khamkéo Vilaysing

Found on Unsplash by William Farlow

Lets Go Outside with Ice Breakers

The purpose of this weeks icebreakers are to get the students OUTSIDE for a bit. Most research seems to claim that students should be getting around 60 minutes of outside time a day. Students are stuck inside for long periods of time throughout the day so these activities are a great way to bring your students outdoors to connect with nature!

The first activity is a game I learned during a drama in situ. I believe this game would be best played outside as it gives the students plenty of space to get creative!

YES LETS is played by everyone walking around in a circle. When someone comes up with an idea they shout it out loud “Lets all jump around like kangaroos” the students must respond with “Yes Lets” before beginning to act out the action that was called out for two minutes before everyone quietly returns to walking in a circle.

Found on Drama Notebook

This activity is an excellent way to build confidence in your students by giving them CONTROL over what they are doing. It is also a great bonding game because you are right there beside the students acting silly with them!

This next activity is a great way to SLOW down and CONNECT with nature.

worksheet created by Little Pine Learners on teachers pay teachers
I edited the worksheet to add colour on canva

I would provide the students some quite time to walk around and fill out the worksheet with whatever they find on their individual nature walk. After I would bring the class together and direct the students to take “one step forward” every time they had the same item listed as their classmate and we would share our findings. This would be a fun way to connect with nature and then COLLABERATE with our peers.

Graphic Creations with Canva- Week 6

This week we practiced using online tools to create graphics! I was introduced to CANVA and was impressed by how easy the site was to use. The first thing I created was a mind map with the ice breakers I have used so far in my free inquiry.

I created this graphic using the template Abstract Mind Map Connection Diagram. I posted my graphic to Instagram as an easy way for my followers to get a quick view of what I am creating on my blog! The purpose is to generate interest using fun colours and key terms.

TEMPLATES:

I enjoyed how canva has a ton of options for templates so you are not required to create your entire graphic from scratch. I appreciate having the option because using a template is not always the best choice, depending on your abilities with canva and what you are trying to create.

POSITIVES NEGATIVES

generates ideas if you know what you need the graphic but do not know how to create one

great starting point for a project

super easy to use

categorized based off of potential needs to help organize your search

some of the templates I wanted to use cost money

limits what you can create if you start with a template (certain designs may be better creating from a blank canvas)

categories can be used for other things (my header image started as a wedding print) so using the categories limits choices

The graphics I created were used to enhance my blog but canva can also be used as an exciting CLASSROOM TOOL. I may create graphics to embed into a slide show to improve my students understanding. I could create EFFECTIVE IMAGES that show the student what I am trying to explain. Some students may learn better by seeing but other students may learn better by reading. Providing text and a graphic together will reach more of your classes LEARNING STRATEGIES for success.

Free Structure of Infusoria organism drawn on whiteboard with markers in classroom of school Stock Photo
Notice how the picture adds to the lesson by SHOWING the students what you are explaining. This same affect could be created with a graphic and embedded into a google slides presentation about parts of a cell. Photo was found on Pexel.com and posted by Katerina Holmes

Creating graphics could also be used as a fun ASSIGNMENT to develop students technology skills. I could provide the entire class with the same template and tell them to create whatever they pleased with the template they were provided. After everyone was finished I would present the class all the graphics created from the same template to demonstrate how even though we all started with the same product our finished projects were different. This could be a fun way to teach my class how everyone is unique and could be a stepping stone into a lesson on perspectives and how everyone sees the world differently.

Some FEATURES on canva I really enjoyed are:

  • templates
  • elements (super fun to add eye catching details)
  • uploads (you can upload your own photos within the website)
  • so many font and colour choices for the text
  • they have a great share feature if you were working in a group
  • lots of features can be used for FREE (pro available at a cost for full access to more options and features)

The most important thing I learned this week was how FUN it is to get involved and create your very own graphics!!!

Lets Get Up and Moving with Ice Breakers

The purpose of todays ICEBREAKERS are to get students up and MOVING! This is a great way to calm down an energetic group before the next lesson, get the kids blood following and have some fun within the classroom!

Photo by: KMorfiris on Unsplash

Mimic Octopus

The idea for this game was found on education.com posted under icebreakers.
Directions: Everyone sits in a circle. The teacher takes one student out of the
circle and out of earshot. This student will be the “guesser”. The teacher then choose someone left in the circle to be their movement leader. The chosen student
then begins to do simple movements while remaining in the circle, the student will change the movement as they see fit. The other students must copy the leader’s movements, while trying not to reveal who the leader is. Every student must continually be doing the movement! The guesser comes back into the center of the circle as the movements continue. That student has three guesses to chose who the movement leader is!

ADAPTIONS:

  • I could try this game having the students use animal noises instead of actions
  • I could have there be two guessers for an additional challenge
  • With older grades I could have two movement leaders and have half the class follow one leader and the other half follow the other
woman in blue and white polka dot shirt holding yellow ceramic mug
Photo by Adrian Cogua on Unspash

Popcorn

This activity was found on teacherspayteachers under 46 free drama games posted by Drama Trunk

Directions: The aim of the game is to get the whole class standing. Students sit silently in a circle. Students must randomly stand up whilst saying a consecutive number (1, 2, 3, 4,
5 so on) the student would remain standing after saying their number.
If two students stand and say a number at the same, everyone must sit down
and start at number 1 again.
The game requires the class to cooperate and use non-verbal communication to
achieve their goal (no talking other than the popcorn numbers). The class cannot work around the circle. It must be random.

ADAPTIONS:

  • students could be instructed to do the alphabet instead of counting- this is great for an introduction to a literacy activity
  • students could be asked to skip count ie: 2,4,6…. 3,6,9….- this is a great activity for students who are working on skip counting, addition or subtraction (have them start at a number and work backwards maybe)
  • have each student make a different animal noise- this is great for working on students memory as well as coming up with lots of animal noises
  • have students each name a different country- great activity for social studies

***** There are so many fun adaptions to link this game to every subject just be sure to keep it age appropriate so the game continues to move

Epic In-Situ with Epic Books- Week 5

Today I got the opportunity to teach a new skill using technology with a group of students at the local Elementary School! We received a warm welcome into the classroom by a lovely group of students. I have to say I was a little nervous to be introducing epic books to kids when I had only used the program once myself. When using technology as a tool in educating children there is always a higher risk that something will go wrong. For example the program may not start, the internet could crash and kids typically take a longer time than anticipated to login and find the site. I can mitigate this risk as an educator by always having a backup plan prepared for the class in case the worst happens and making sure I know the resources available at the school if I do run into any technology issues!

Overall I had a WONDERFUL experience showing the kids how to use epic books and I am so grateful for the opportunity. I did notice that the touch screen laptops at the school caused some additional challenges with group work as one kid would be using the mouse to search for a topic of books and their partner would see a book they liked and take over control by touching the screen. This was a frustrating obstacle I had not foreseen but this feature can be used to help the students work on collaboration. Next time I would go over the expectations with the students before I brought out the computers. I would go about this by setting clear guidelines that one student controlled the laptop at a time and we did not touch the screen when it was not our turn!

I enjoy that epic books provides a vast selection of books which creates lots of excitement in the classroom but I found that the kids had a very hard time focusing on one book long enough to finish before getting distracted by different books. Typically during reading time the kid would select a book from the classroom library and head back to their desk away from all the other options allowing for clear focus on the single book in front of them. With epic books my students were on to the next book before finishing the one they had started.

Epic books does a good job limiting this by giving points to the students when they click finished. This is a great feature to help the kids want to get to the end of the book! Some of the books also have quizzes at the end to assist the students ability to comprehend the book they just read. Teachers can also see how long a student takes to finish reading each book. Each of these features is an unique tool for assessing how well each student stays on track and I would use this information to direct my attention to which student needs additional encouragement at that time. The online resource is also a great way to help keep track of my students interests by showing me which books they are reading and I can use this information to develop personalized connections with my students.

Given my experience today I would absolute use epic books in my own classroom with some limitations. I would be sure to still have a fully stocked library with physical book options but I would enjoy having special reading days where the kids got to use the computers for reading time and have a chance to earn points and medals on their very own epic books account.

First Day of Classes Ice Breaker

So last week I shared a couple resources I found of off teachers pay teachers and I thought it would be handy to do a quick Screencastify tutorial on how I found my ice breaker for this week!

This weeks ice breaker is a back to school classic!

Purpose:

  • It is a great way to get kids up and moving
  • the kids meet new classmates and get to know them with the hopes of forming bonds based of similar interests.

I found this particular work sheet on Teachers Pay Teachers by searching for activities that were appropriate for grade three but the exciting thing about this ice breaker is that it is so easily adapted to fit whatever your needs are that day!

I really like the rule that you can only use each student once because it encourages the students to interact with more kids. I have seen this bingo style game adapted to fit a certain holiday or season which would be a great way to introduce kids to the idea that different families all have their own traditions to make the holidays special for them.

As the educator I would absolutely include myself in this ice breaker because it is a great way to allow the students to get to know me and start building a personal relationship with my class.

I believe it is a great way to be more relatable and show your students that you may be the teacher but you are also a person with interests.

This is an easy game to bring into my PRACTICUMS to get to know the students who will be helping me further my own education. It is an adaptable game with very few materials that develops students social and communication skills and will hopefully make them a little more comfortable with their new classmates!

Practicing with Screencastify- Week 4

During class this week I was introduced to the tool Screencastify and how it could be used in an educational setting to promote learning! I found that one of the most significant advantages of using video in the classroom is that it is fun! Incorporating mixed media in the middle of a slide show for example is a silly way to grab the attention of your students if you need to present long pieces of information without activities and movement to break up the lecture. Screencastify is a simple way to record short voice video with screen sharing technology. Below is a QR code that will bring you to my very first Screencastify video, please follow the link and check it out!

Ms.Johnson on Epic Book: Exploring my library

Challenges:

  1. The first issue I ran into while creating this video is sound quality. It is very important to remove yourself from any loud generators or external noises in order for the focus it be on your voice!
  2. I also created this video freestyle while using the screen sharing technology but next time I would better outline a script before recording to ensure clarity and professionalism within the clip.

It was a very easy process to create and with more practice it could be an excellent tool in the classroom! Please be aware that Screencastify must be used on Google Chrome or Microsoft Edge and you will need to sign in with google to use the application!

For this clip I choose to use the editing features within the free version of the application and found there were very few options to edit the clip. I was able to add a title page and cut out and mistakes in the clip but the editing software was not user friendly and I was not pleased with my end result. Next time I would export the clip and load it into an external editing software like imovie to play around with more features and try to uplift the content.

Overall I was very please by Screencastify as a tool for learning! It is easy to use, a new and fun way to provide information to students and easy to provide a link so students can watch the video over and over! This could be an excellent way to take important but dry information and show it to the kids in a way that they an continuously look back on! This tool could also be used to share pieces of what is happening within the classroom with parents in a new and personalized way.

« Older posts Newer posts »